Build an eCommerce Store
Build a beautiful online store, manage your orders, accept payments, and ship your products to customers around the world.
5/8/202410 min read
How to Start a Shopify Store in 2025 (Beginner’s Guide)
You want to start a Shopify store but don’t even know what the first step is to take.
You’ve seen other businesses like yours with beautiful online stores and you want one too.
It’s like you have a blank page in front of you and a storyline that’s hiding in the quiet corners of your mind.
Well, you’re not alone.
In this guide, I’ll guide you through every step, from setting up your store, adding products, customizing your store, and even testing that first order before the big launch!
By the end of this, you’ll have everything you need to get your Shopify store up and running.
Ready? Let’s get started!
Disclosure: Our website is reader-supported. If you purchase any service through our partner links, we may earn a commission at no extra cost to you.
What is Shopify?
Shopify is a powerful eCommerce platform that helps entrepreneurs to start their own online stores. It was founded in 2006 by Tobias Lütke, Daniel Weinand, and Scott Lake after attempting to open an online store for snowboarding equipment.
That’s an inspiring story.
I mean, identifying a problem can lead to innovative solutions. Instead of just selling snowboards, they created a platform that helps others get started in eCommerce.
And now, Shopify is a platform for over 1.75 million merchants and it’s no surprise that so many businesses rely on it to sell their products online.
Why?
With Shopify, you can create a professional online store, manage inventory, accept payments, and ship orders all in one place.
And, the checkout process is also easy to use and they offer a wide range of features that will help you run your business smoothly.
What to Sell on Shopify?
Starting a shop on Shopify is simple. You can set up everything in almost 40 minutes, but the question remains: what should you sell?
Well, there are many things that you can sell on Shopify.
You can sell on Shopify including physical products, digital products, and services.
You can also sell membership plans, consulting, gift cards, and subscriptions.
In addition to that, you can even sell event tickets on Shopify. So what’s on your mind? Take a moment to think about it and have a clear picture.
How to Start Your Shopify Store
As you know, starting a Shopify store is easy and can be done in just a few steps even you don’t have experience.
There is no need to worry about coding skills, as Shopify takes care of all of that for you.
However, you need to go through each step one by one.
So let’s get started!
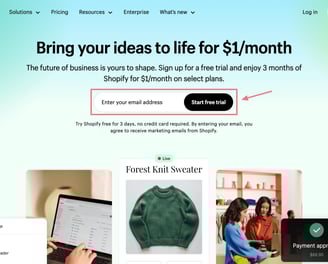
Step 1: Sign up for Shopify
First, you need to sign up for a new Shopify account. You can do this on the Shopify website. Once you have an account, we can start building your online store.
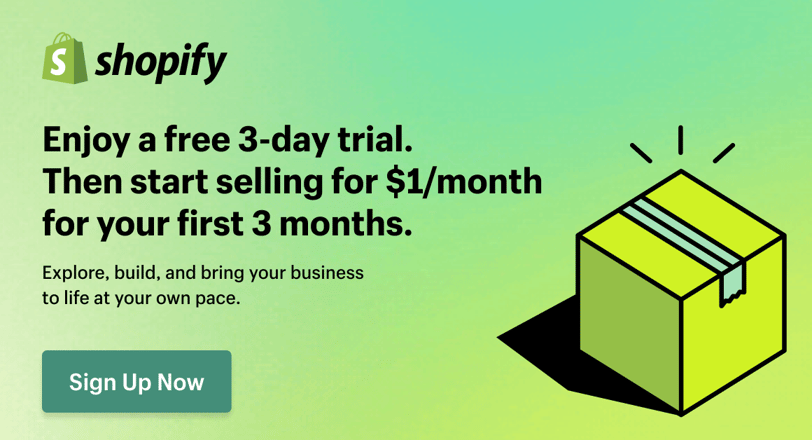
The best part is that Shopify offers a 3-day free trial + 3 months of Shopify for just $1, so you can try out the entire platform risk-free.
→ Click here to head over to Shopify, enter your email, and hit the “Start free trial” button
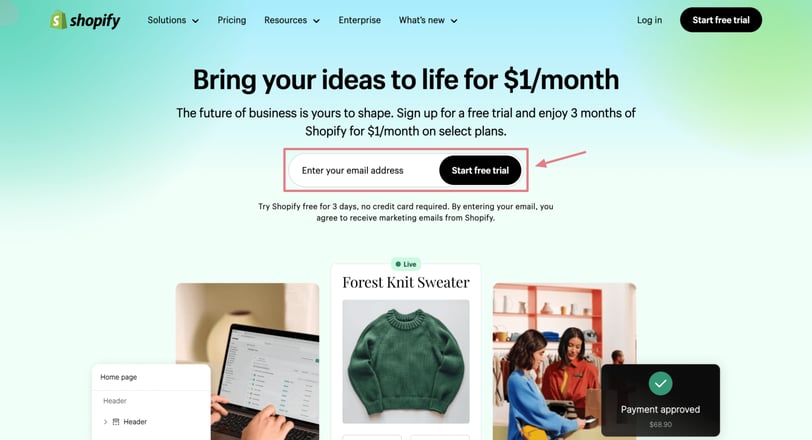
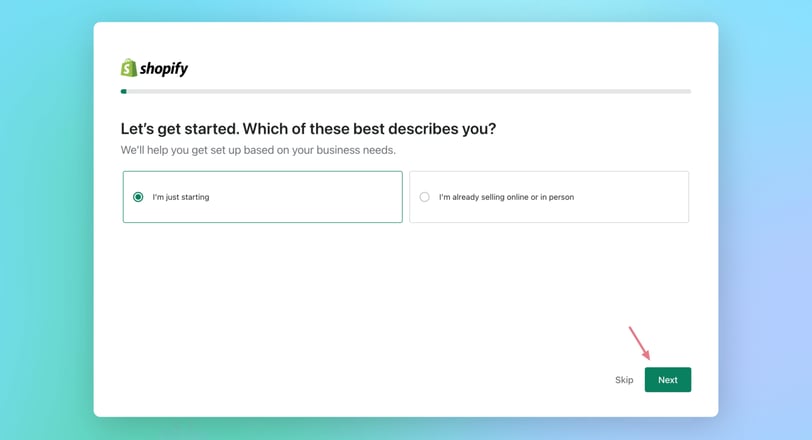
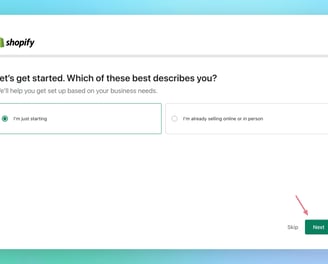
After that, Shopify will ask you about your experience. If you have never set up a store before, select “I’m just starting” and then click “Next.”
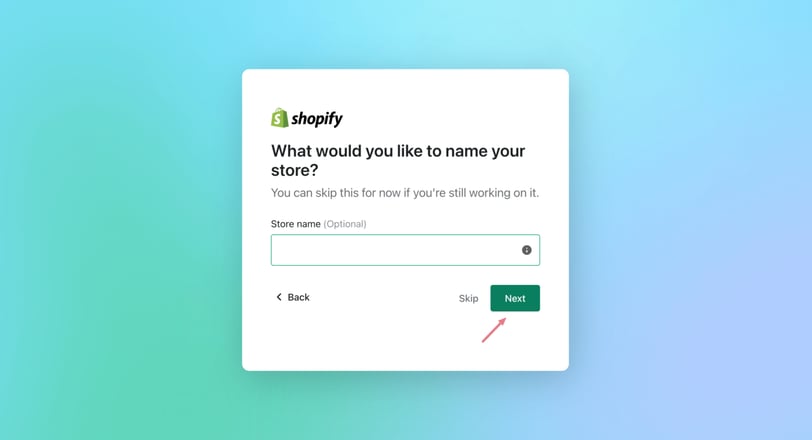
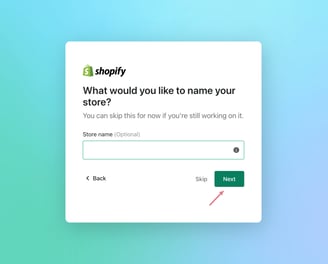
Your shop name is how customers will find you online, so choose something memorable and easily searchable.
Brainstorm a few ideas before deciding on the perfect name for your store.
Once done, give a name for it and click “Next.”
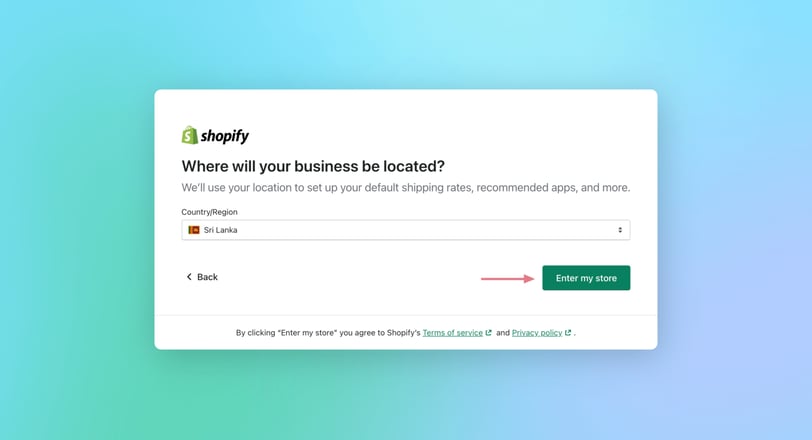
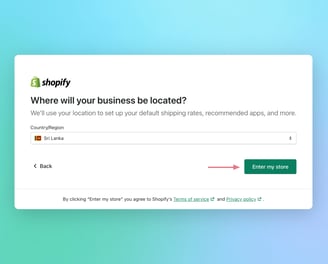
Lastly, tell them where your business is located and then click on the “Enter my store” button to complete the signup process.
After all, Shopify will ask you to create an account with them. Sign up with your Google account or use your email to create a new account.
Congratulations! You’ve finally taken the first step and signed up for Shopify.
Note: At this time, you may receive a confirmation email from Shopify asking you to verify your email address. Simply click the link in the email and you’re good to go.
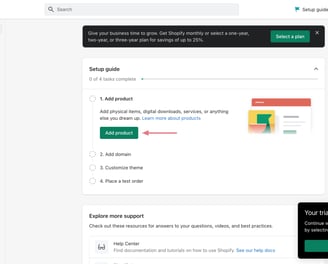
Step 2: Add Your First Product
Adding your first product to your Shopify store is not that hard. Simply click on the “Add Product” button from your Shopify admin panel.

From there, you will be able to enter your product’s name, description, price, and more.
Be sure to add high-quality photos of your product as well.
If there are product photos that you wish to remove the background, you can use one of the AI background remover tools to get the job done.
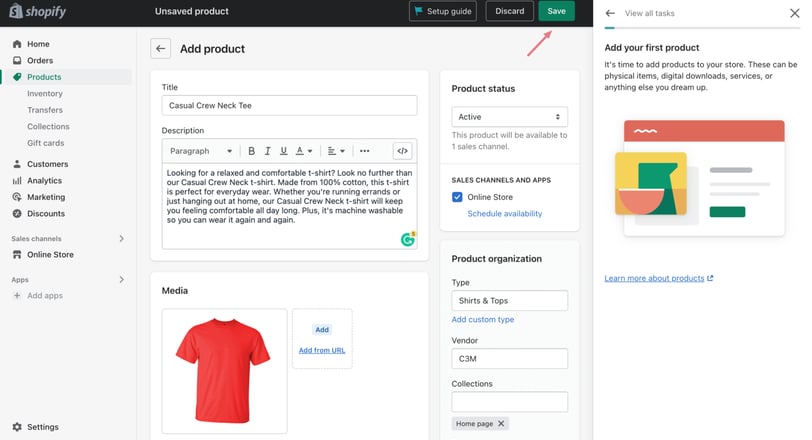
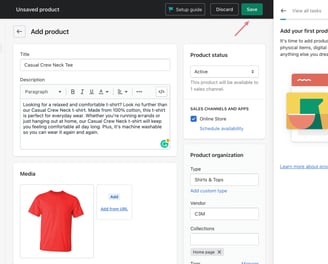
Once you have added all the necessary information about your product, click on the “Save” button and your product will be live in your store.
Note: If you feel stuck at some point, I highly recommend you take the free course at Shopify’s learning center. This will ensure that you understand everything you need to know about adding products to Shopify and help you avoid any mistakes.
Step 3: Pick Your Domain Name
Your domain name is the way your customers will find you online, so it’s important to choose one that is easy to remember and represents your brand well.
To set up your domain, simply click on the “Add domain” button from the right sidebar.
(You can also find the Domain section by navigating to Settings > Domains from the Shopify admin area.)
By default, Shopify gives you a subdomain (yourname.shopify.com) but you can also register a custom domain name (www.example.com).
Shopify makes it easy to register a custom domain name for your new online store. Click “Buy new domain” and follow this simple guide on Shopify.
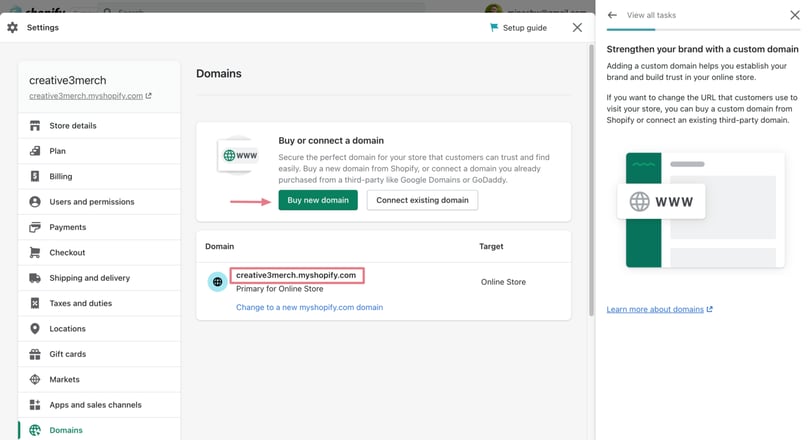
If you already have a domain name registered with a 3rd party provider like Namecheap, you can also connect it to your Shopify store.
Step 4: Customize Your Online Store
You don’t need to be a web design expert to make your store a beautiful and professional online store.
Shopify makes it easy to customize your current theme to match your brand and style.
To start customizing, go to Online Store> Themes, and click on “Customize.”
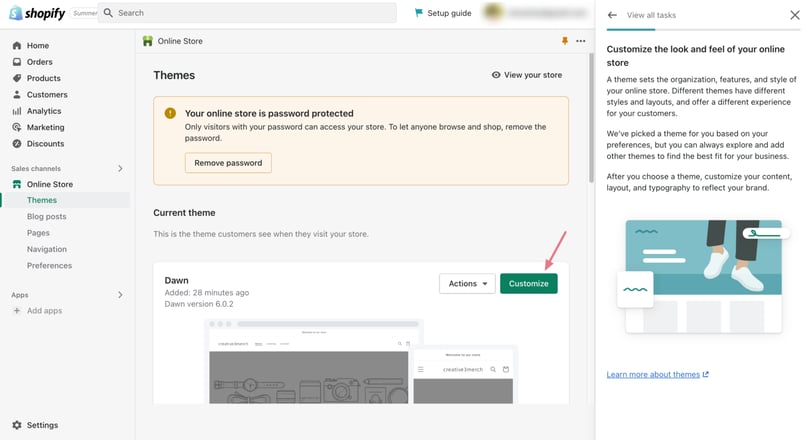
After that, you’ll be able to edit the look and feel of your store.
Take a few minutes to play around with the settings and options, you can make sure that your store looks exactly the way you want it to and functions perfectly for your customers.
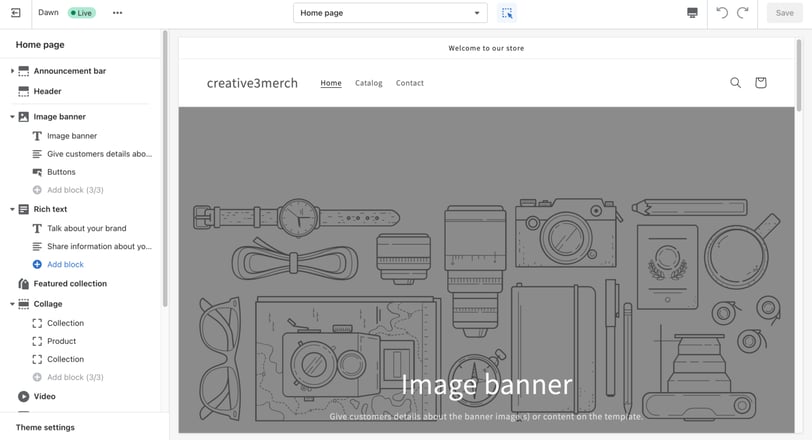
You can also choose a different theme for your Shopify store.
There are a variety of themes available, so take some time to browse through them all until you find the perfect match for your Shopify store.
Next, the most important thing, you’ll need to add a custom logo to help represent your brand.
To do this, you can use an AI tool like Tailor Brands to design and download your logo.
It’s not free but the best option for creating something unique without hiring a designer. You can simply save hundreds of dollars.
Apart from the theme customizer, you may also need to pay close attention to the following settings under the Online store section to keep your store running smoothly:
Blog posts: A blog post is simply an article that is published on your Shopify store. Shopify has built-in blogging tools so you can write and share valuable information about your business, industry, and so on.
Pages: At least your Shopify store should have About Us, Contact Us, Privacy Policy, and Terms of Use pages. Once you’ve created your pages, make sure to keep them up-to-date so that they continue to protect you and your customers. To generate legal pages, you can use Shopify’s privacy policy generator.
Navigation: This helps you manage menus or link lists to help your customers navigate around your online store easily.
Preferences: This section has all the settings related to SEO, Social sharing, cookies, and other tracking options.
If you just don’t have the time to do all of these yourself, you can hire a Shopify expert to help you build or redesign your Shopify store to make it look exactly the way you want. It may require some upfront investment, but the benefits can be well worth it.
Step 5: Shipping and Delivery
Shipping and delivery can be a painful process, but thankfully Shopify has a number of built-in features to make things easy.
Whether you’re shipping items yourself or using a fulfillment service, it’s important to understand all the details of shipping so that you can get your products to your customers in the best possible way.
To learn more about how Shopify shipping works, simply head over to this guide on the Shopify help center.
Moreover, it’s also super important to understand the different types of taxes you may need to pay.
Depending on your business and location, you may be required to collect and remit taxes.
For more details, read this guide from Shopify.
To set up, go to Settings > Shipping and Delivery. On the Shipping and Delivery page, you will see a section for Shipping rates. Here you can add your shipping rates for different regions.
Step 6: Payments
When you are ready to launch your Shopify store, you will need to choose a payment provider.
There are many options available, so it is important to think about your needs before making a decision.
First, think about which countries you want to sell to. Some payment providers only operate in certain countries.
Second, think about what type of payment methods you want to accept.
Finally, compare the fees charged by different providers.
Most importantly, you will want to weigh the customer support offered by the provider.
Why?
This is important in case you have any problems with your customer payments.
So take time to compare your options, and make sure to choose the right payment provider for your Shopify store.
To link your Payment provider, simply go to Settings > Payments in your Shopify admin and select the payment provider that you want to use.
Step 7: Place a Test Order
You’ve set up your Shopify store and it’s time to take it for a test drive.
A test order is a great way to see how your Shopify store works from the customer’s end.
It also lets you check out the different features of your store and make sure everything is working properly.
To get started correctly, follow these simple steps from Shopify to learn how to place a test order.
Step 8: Launch Your Online Store
Now that you have a Shopify store, it’s time to launch your online store.
I know, this is an exciting moment for you, as it marks the beginning of your journey to success.
However, before you launch your store, there are a few things you need to do to make sure that everything is well aligned.
First, choose your Shopify plan.
To do this go to your Shopify admin > Settings > Plan > and click “Choose a plan” to pick the one that best suits your needs.
The Basic Shopify plan is $29 per month, and it’s a good choice for small businesses just getting started with eCommerce. (Note that the Shopify plans can vary by region.)
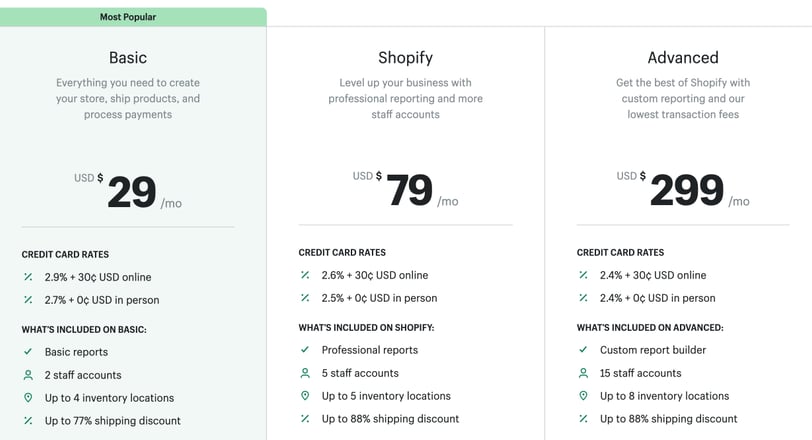
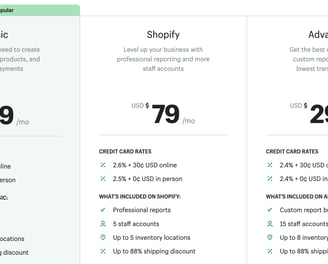
The Shopify plan is $79 per month, and it gives you access to more features. The Advanced Shopify plan is $299 per month, and it’s best for high-volume businesses.
If you’re not sure which plan to choose, start with the Basic plan and upgrade later as your business grows.
Second, take some time to test your store. Make sure that all your products are ready to sell, correctly priced, photographed well, have accurate descriptions, and that the checkout process is smooth.
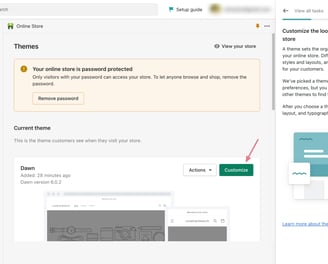
Third, remove the password of your online store. It will let anyone browse and shop. You can do this by navigating to your Shopify admin > Online store > and clicking on “Remove password.”
After that, you can see your store it at yourname.myshopify.com or your custom domain name.
If everything looks good, then you’re ready to start selling!
What’s Next?
Congratulations on taking the first step towards starting your eCommerce business!
A Shopify store is a great way to reach a wider audience and boost sales.
This platform is super user-friendly and seriously powerful, packed with built-in marketing tools to make setting up your store super simple.
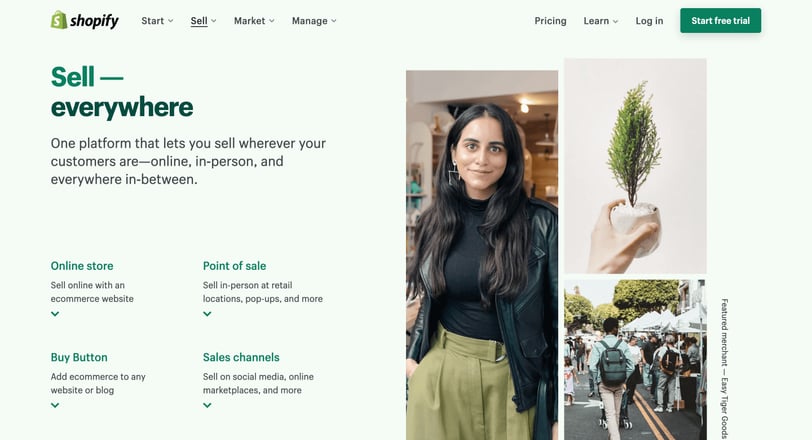
And if you’re looking to take your business offline or already have a physical store, Shopify POS (Point of Sale) is another standout option they provide for you.
They provide both the software and hardware for POS, making managing your store’s activities straightforward.
It seamlessly integrates your online and offline sales, allowing you to manage everything from one place.
Let’s not forget about the free online courses!
Whether you’re new to eCommerce or looking to expand your business, Shopify’s free online courses are a great resource.
The courses cover a range of topics, from setting up your shop to marketing and selling products. They’re designed to be easy to follow and understand, so you can get started right away.
So why not give Shopify a try? Click here to start your 3-day free trial if you haven’t tried Shopify yet.
Happy selling!
About
We assist regular people in launching and expanding their internet businesses from the ground up. Beginner-friendly, extremely simplified resources to help "YOU" at every stage. Today, take the first step.
Copyright © 2019-2025 TalkEra