Start a Blog the Right Way
Learn how to start a blog the right way. And the best part is, that anyone can do it. You don’t need any special skills or experience.
It’s totally possible—and millions of people are already doing it.
Maybe you're feeling it’s too complicated, or you're worried that no one will read your blog.
I was once in the same position when I started this blog.
Now, this blog is my primary source of passive income—something I never imagined just 5 years ago.
And the best part? You’re not alone in this journey!
In this comprehensive, step-by-step guide, I’ll walk you through how to create the most popular type of blog: a self-hosted WordPress blog—done the right way.
Ready to take the leap? Let’s dive in!
Disclosure: Our website is reader-supported. If you make a purchase through our affiliate links, we may earn a commission at no additional cost to you.
you're not alone. Here's a helpful guide with answers to the most common questions new bloggers have when starting their first blog.
What is a Blog?
A blog is a frequently updated website that contains posts (articles) about a specific subject. It’s typically run by an individual or a small group.
The main goal of a blog is to inform, educate, and entertain the audience so that they return for more engaging content.
Blogs are a platform to share ideas, information, thoughts, insights, and experiences with a global audience.
Why You Should Start a Blog?
Even if you want to start blogging as a hobby, there’s someone on the other side of the internet who will find your content helpful.
For example, let’s say someone searches for “easy dinner recipes” or “how to bake bread at home.”
If you’re passionate about cooking and have unique recipes and tips to share, starting a blog allows you to connect with a wide audience, create a community, and even make money from your content.
That means you can focus on something worthwhile.
In short, doing what you love is always better than doing nothing!
Can I Start a Blog Without Technical Experience?
You don’t need coding knowledge to start a blog. However, it’s always helpful to learn new skills.
I’ve designed this guide specifically for beginners, so you’ll have access to all the resources and tools needed to create a WordPress blog, even without any technical experience.
Do I Need to Be a Great Writer to Start a Blog?
You don’t have to be a professional writer to start a blog. Blogging is about sharing your perspective and connecting with your audience.
Just like learning to ride a bike, you might not be perfect at first, but you’ll improve with practice. Focus on being clear, genuine, and helpful.
Can I Make Money With My Blog?
Yes, if your blog offers content that people find valuable, you can definitely earn money through blogging.
To monetize your blog, you can explore methods like affiliate marketing, sponsored posts, selling ebooks, selling physical goods, or even getting advertisers to promote their products through your blog.
I’ve been doing this for years, and we'll cover these strategies in more detail later.
How Much Does It Cost to Start a Blog?
You can start a blog for free, but if you want to make your blog profitable, there will be some small investment required.
Free options often come with limitations, and even if you make money, you may end up with nothing.
For a self-hosted WordPress blog, you’ll pay between $35.40 and $50 for your first year, covering all the essential expenses.
Sounds good? Let’s get started!
Step 1: Pick a “Perfect” Blog Topic
Your blog’s topic is important!
If you have a business, your blog topics should revolve around your products or services to promote them.
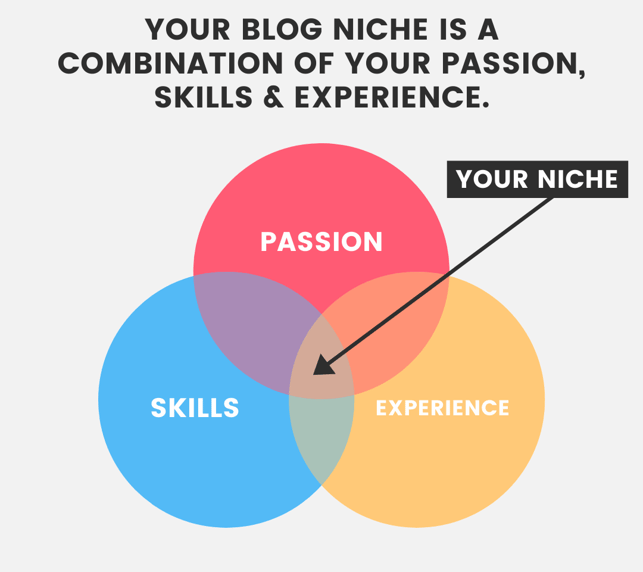
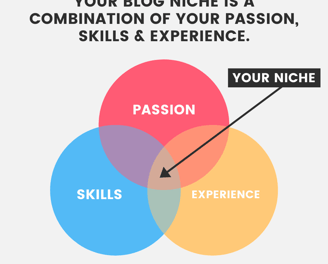
For individuals, your blog should cover a topic you love—called a "Blog Niche"—such as food, travel, tech, or anything else you're passionate about.
Ask yourself:
How passionate are you about this topic?
How passionate are your potential readers?
If you’re passionate about something and have the knowledge to back it up, go for it!
How to Start a Blog in 2025 (Beginner’s Guide)
Introduction to Starting a Profitable Blog
Starting a blog can be one of the most profitable online businesses to begin, especially with a low startup cost.
But how can you start a profitable blog? What should you write about, and how can you actually make money from it?
If you have many questions.


Some popular blog topics to consider:
Beauty and Fashion
DIY and Crafts
Health and Fitness
Home Decor
Education
Food
Travel
Tech
Parenting
Lifestyle
Finance
Choose something you enjoy discussing, and learn as you go!
Step 2: Choose a Blogging Platform
When starting a blog, you need a platform to host your content. Think of it as a kitchen in a restaurant; you need the right tools to serve your audience.
WordPress is the most popular and beginner-friendly blogging platform, and it gives you complete control over your blog.
You have multiple choices for blogging platforms. Some are easy to use, while others have limited customization options and require a significant investment to upgrade.
In the blogging world, WordPress is the most popular platform for blogging. The great thing is that it’s free to use and you have complete control over your blog.
What is WordPress?
WordPress is the most popular Content Management System (CMS) in the world, used by millions of bloggers and countless companies and organizations.
Over 43% of all websites are powered by WordPress, making it one of the world’s most-used platforms for creating blogs and websites.
The reason WordPress is so popular is that it allows you to easily create a website without coding skills.
That is the way I built this blog that you’re reading right now.
But can WordPress do everything?
Let’s move on to the next step to clarify this.
Step 3: Get the Best Web Hosting
Just imagine the restaurant once more. It has a kitchen, right? And what about the dining area? The restaurant requires a kitchen to prepare food and a dining area to serve it to customers. Similarly, you need WordPress to handle your blog content and also a web hosting service to deliver it to your readers. In other words,
The blogging platform (WordPress) will take care of all the content, blog posts, media, and everything on your blog. (like a restaurant’s kitchen.)
The Web host will make your blog live and accessible on the internet by providing a space for it. (like a restaurant’s dining area.)
Now, you have to choose a beginner-friendly web hosting service provider to start building your blog using WordPress!
Step 4: Set Up Your Blog
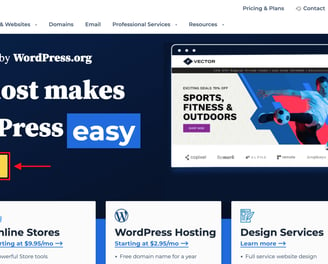
Thankfully, Bluehost, a web hosting provider that is easy for beginners to use, offers great web hosting packages for starting your WordPress blog without all the confusion.
The best thing is that there are no complicated instructions to follow, and it only takes around 20-30 minutes to set up everything.
→ Click here to head over to Bluehost and hit the “Get Started” button

Bluehost is also the most recommended host by WordPress and has been around for a long time. It already powers millions of websites, so you don’t have to worry about anything.
From the moment you sign up, Bluehost guides you through an intuitive setup process.
Mainly, they will provide you with the following benefits:
Free Domain Name for the first year
Free SSL Certificate included
One-click WordPress installation
SSD Web Storage for faster performance
24/7 live expert support
30-day money-back guarantee
First, choose the web hosting package you like. I suggest going with the basic package since it includes all the essentials for beginners.
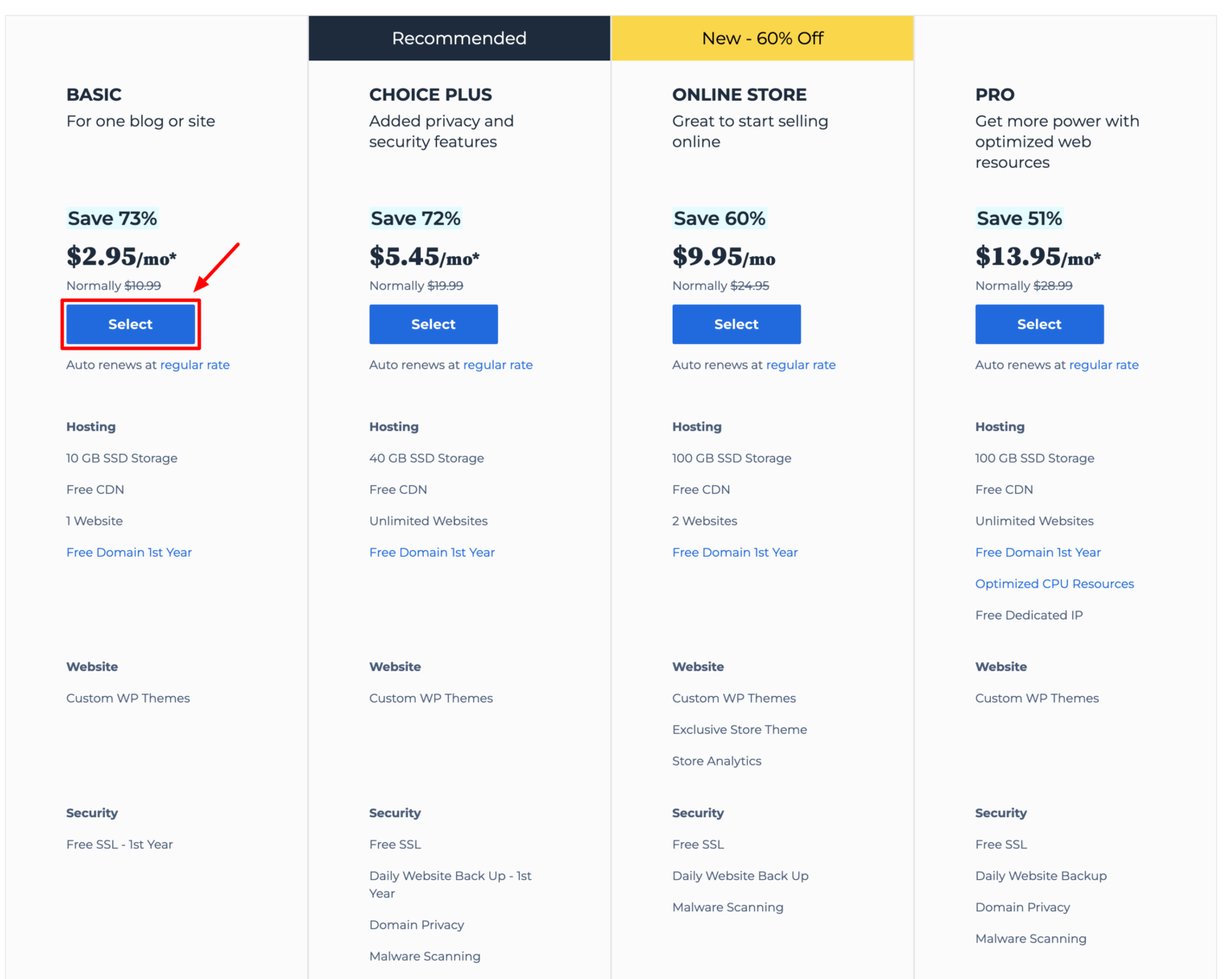

If you don’t want to, you can also choose a higher package to start multiple blogs. You can also upgrade your package later if needed.
Then, enter the domain (your blog address) you want to use. It can be your name, company, organization name, or any name you want for your blog domain.


Bluehost gives you a free domain name for the first year and also includes a free SSL certificate. This means you can start your blog without spending any extra money.
You could save around $30.
What is an SSL certificate?
An SSL certificate is a way to encrypt data between a website and a visitor’s web browser. It provides security and protects the site from unauthorized access.
Think of it like sending a letter. Without SSL, it’s like sending it in a plain envelope that anyone can open.
With SSL, it’s like sending the letter in a locked envelope that only the recipient can open. This keeps your information safe and secure online.
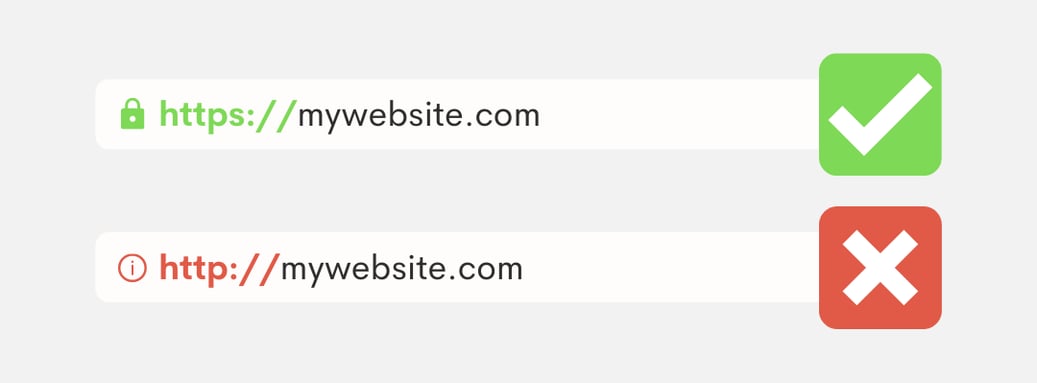

You may have noticed a padlock symbol on your web browser’s address bar when you visit a website that uses SSL.
Make sure to choose a short and easy-to-remember domain name.
If your preferred domain name is not available, you have two options: either try another name or select the “I’ll create my domain later” option to set up a domain after purchasing the hosting package.
Now, you need to create your Bluehost account. You can sign in using your Google account or by manually entering your contact information.
Make sure all the details are correct

Once you’re done, pick your package details.
You have the option to select a pricing plan based on how early you want to pay. You can choose between paying for 12 or 36 months in advance.
If you pay for 12 months upfront, your yearly expenses will be only $35.40, and there’s a 30-day money-back guarantee, so no need to worry about any risks.
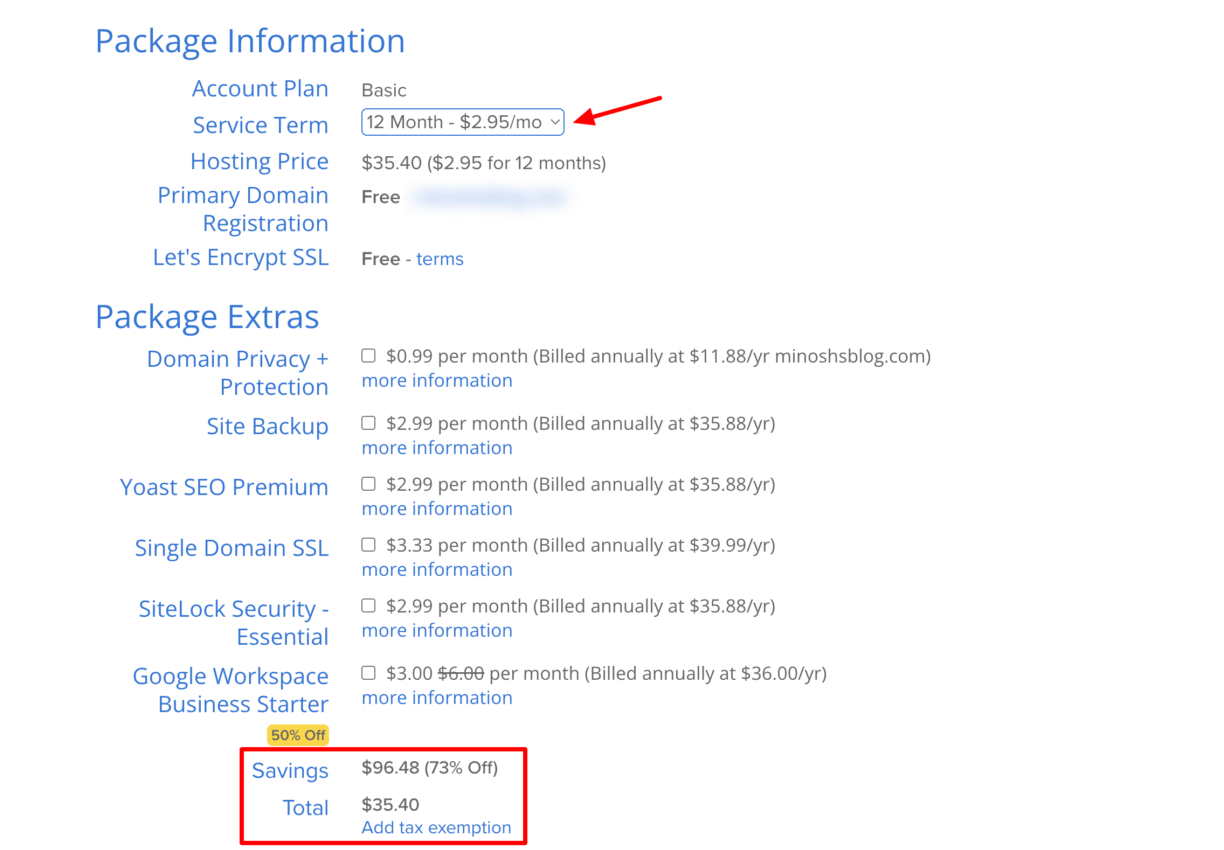
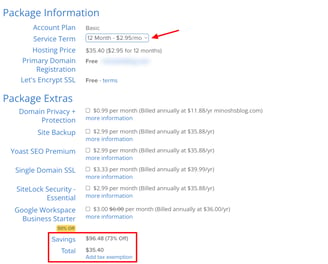
Furthermore, watch out for pre-ticked extra package features. I suggest keeping the “Domain Privacy Protection” option. The other options aren’t really needed for beginners, but you can select them if you prefer.
What is Domain Privacy Protection?
When you register a domain name, your details will be stored in a public directory. Bluehost’s Domain privacy protection will help you protect your personal information online and replace it with generic Bluehost contact information instead.
If you don’t want any other extras, make sure you’ve unchecked the boxes.
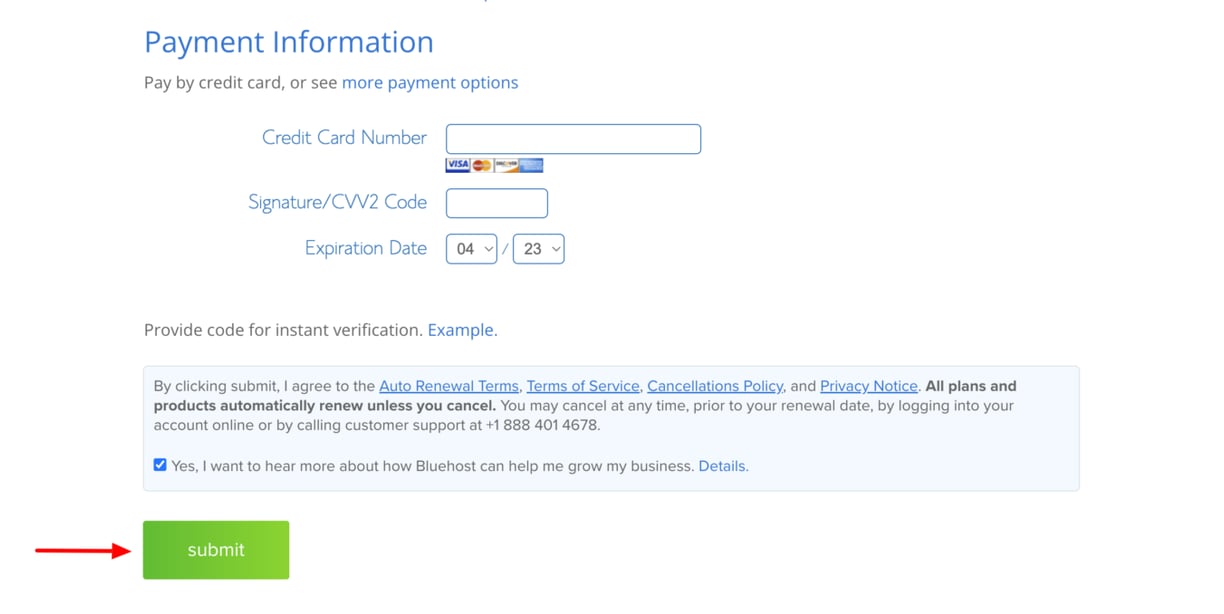
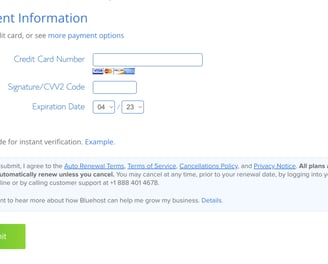
Lastly, complete your hosting purchase. Provide your payment details, read through the Bluehost Policies and Terms, and click the green “Submit” button!
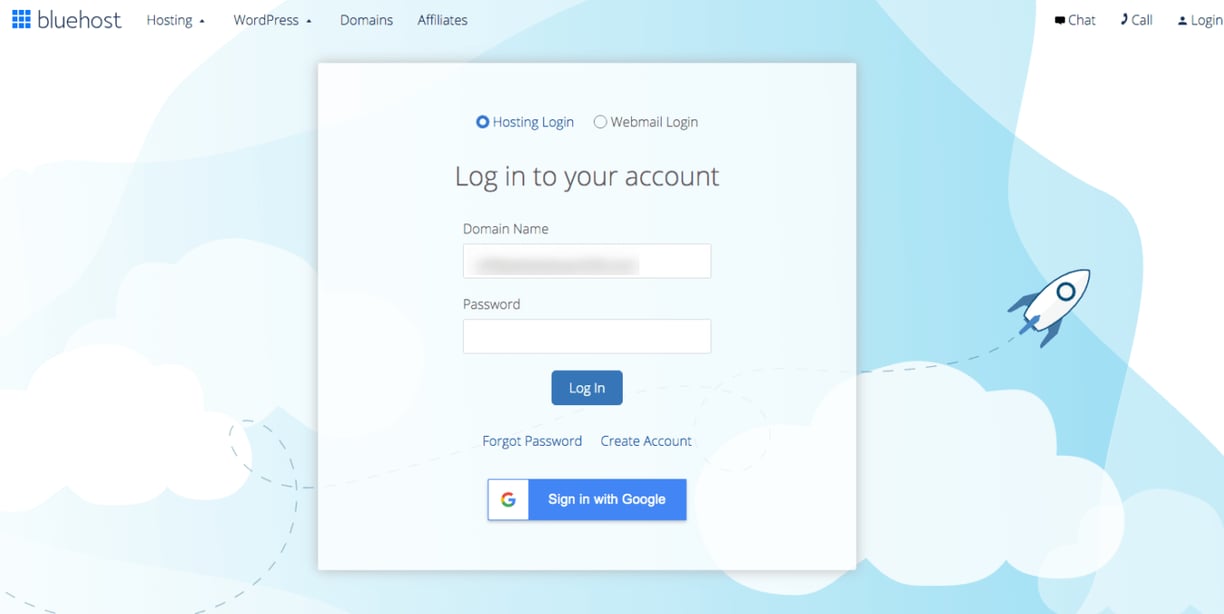
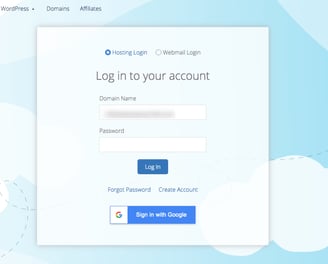
Next, log in to your Bluehost account using the password you recently created. Alternatively, you can sign in with Google if you previously signed up using that option.
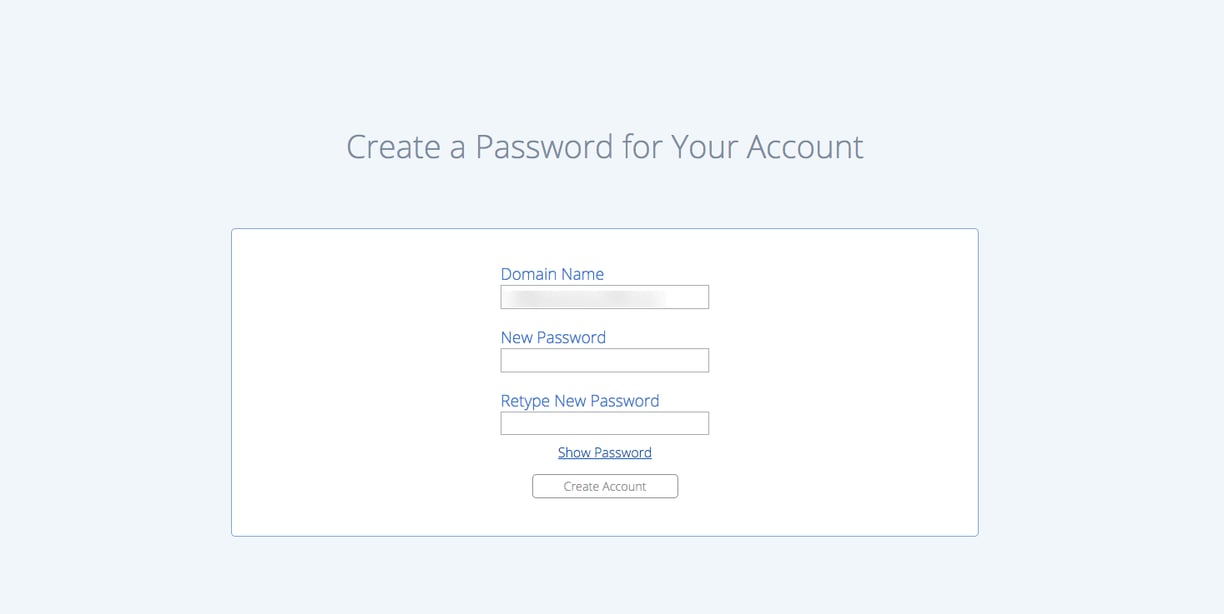
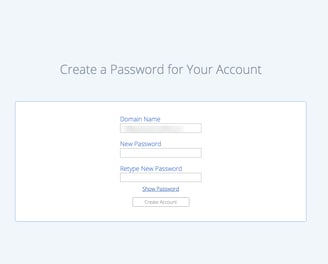
After that, create a password for your Bluehost account. This is the password for your Bluehost account, not for your WordPress blog (which will receive you via email).
Just wait for a few minutes for the next step to come up.
Give your blog a name and tagline. Enter the name of your blog and the tagline of your blog. Toggle on the switch next to “Do you want a blog?” to make sure everything is set up correctly.
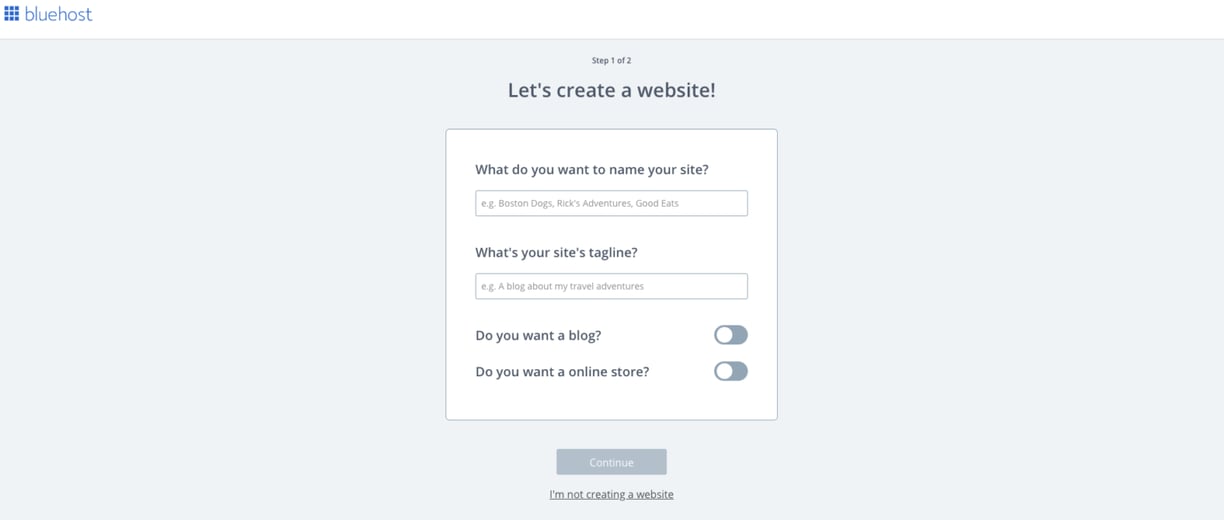
You might be asked some survey questions about your online goals and experience.
Answer them and move on to the next step.
Now select a theme for your blog. You can choose between a free or premium theme based on your preference. For now, you can skip this step or choose any free theme. Remember that you can change it later.
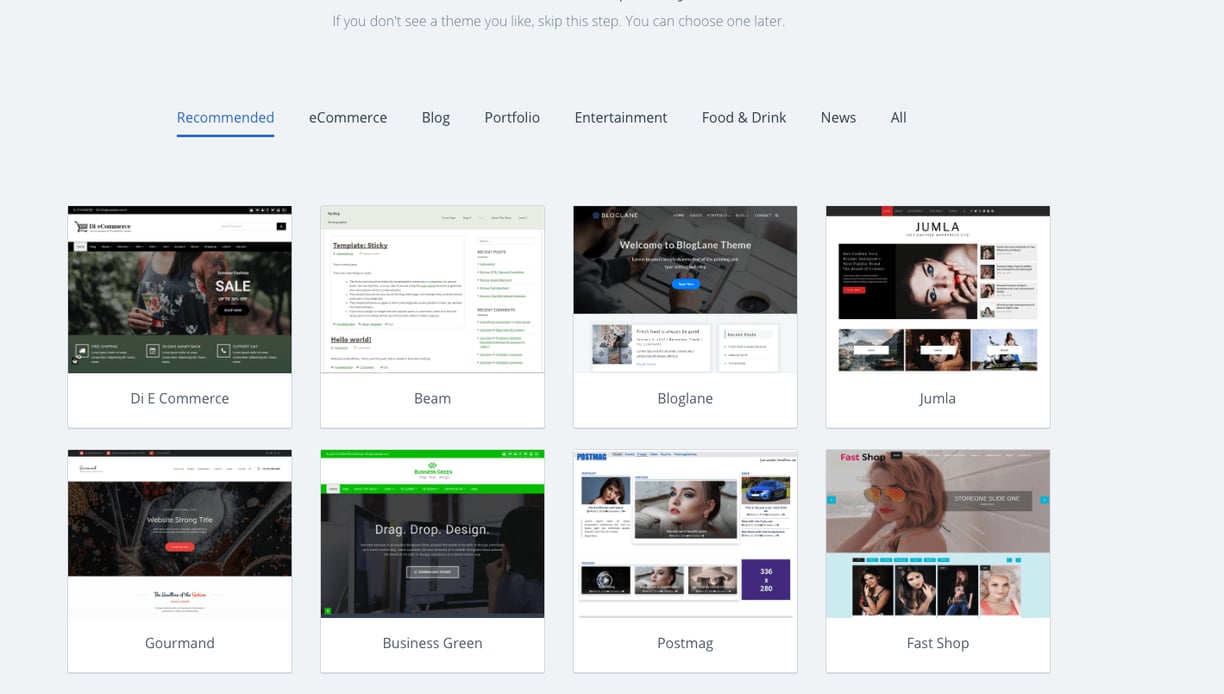

When you’re finally all done, your WordPress blog will magically start installing itself.
Piece of cake, isn’t it?
However, if you’re experiencing any problems up to this point, don’t hesitate to reach out to Bluehost support for help.
They also have a knowledge base with a lot of articles, guides, instructions, and answers to common questions.
So, make sure to take advantage of those valuable resources.
Step 5: Get Started With WordPress
You can now start building your WordPress blog the way you want.
Just keep in mind that you’ll need two sets of login information:
Bluehost login details: These are used to manage your hosting account settings and pay your hosting bill.
WordPress login details:These are used to access the WordPress admin area, where you can write blog posts and manage your blog.
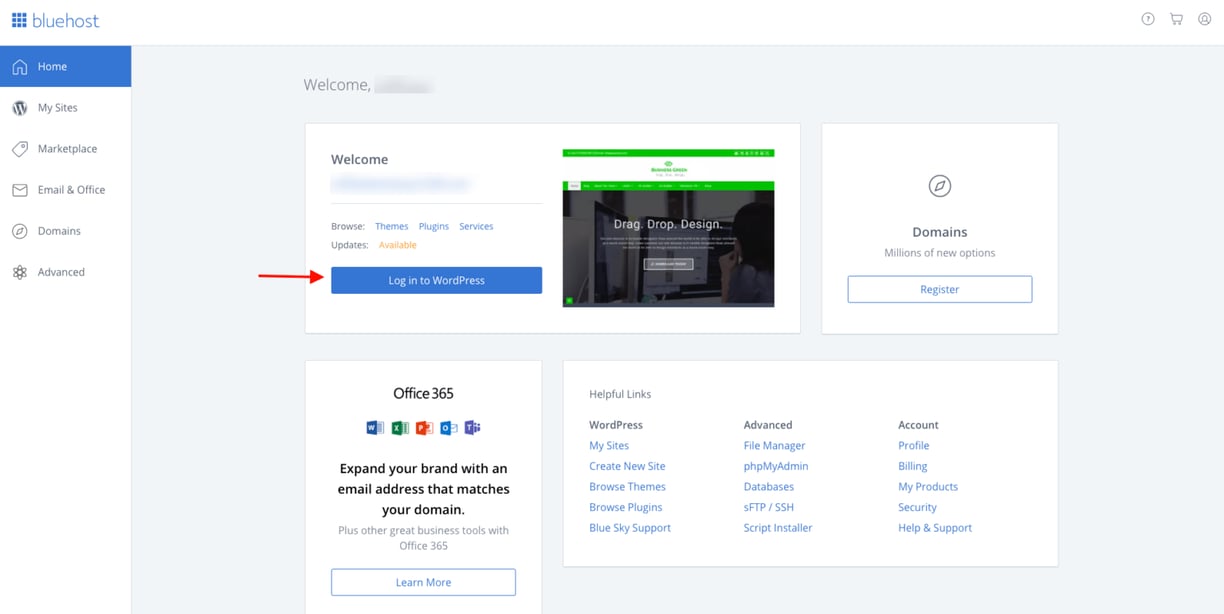
But since we spend a lot of time on WordPress, you’ll usually need the WordPress username and password (check your email inbox) to log in to the WordPress dashboard.
Alrighty then, welcome to the WordPress Dashboard!
This is where you can share content like posts and images on your blog. We can also add WordPress plugins to give your blog extra features.
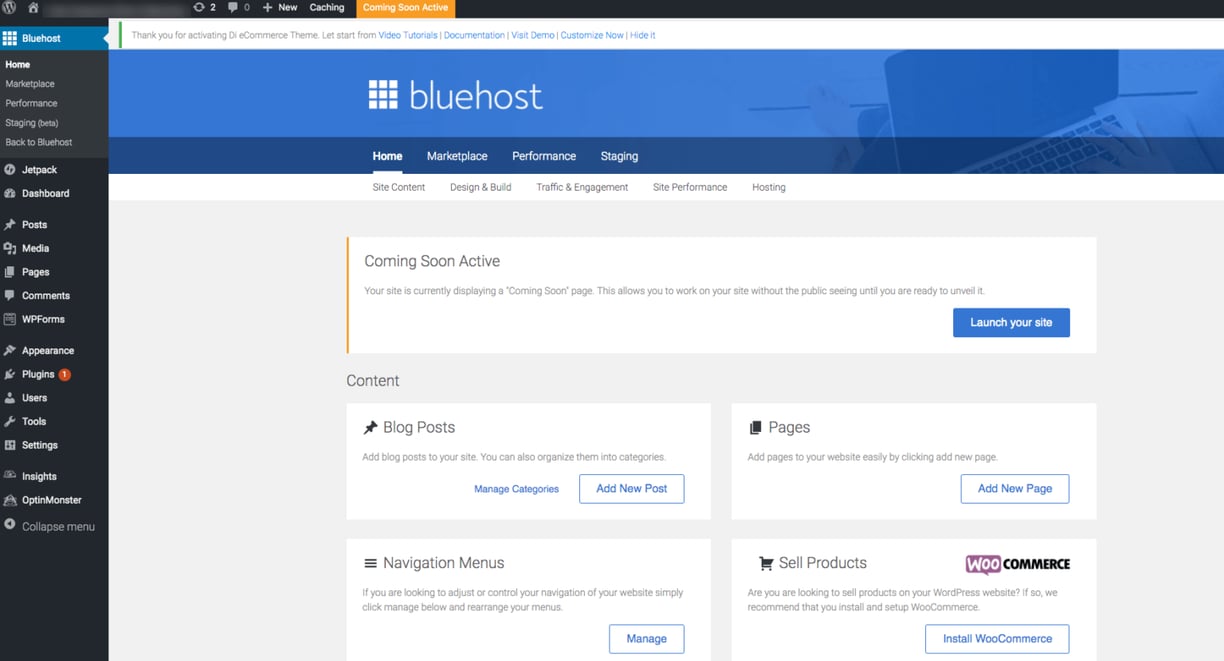
It might seem difficult at first, but it’s actually easier than it seems.
I recommend reading my WordPress beginner’s guide to better understand everything.
Here are some settings you should look at to make sure you’re heading in the right direction.
For now, go to Settings > General
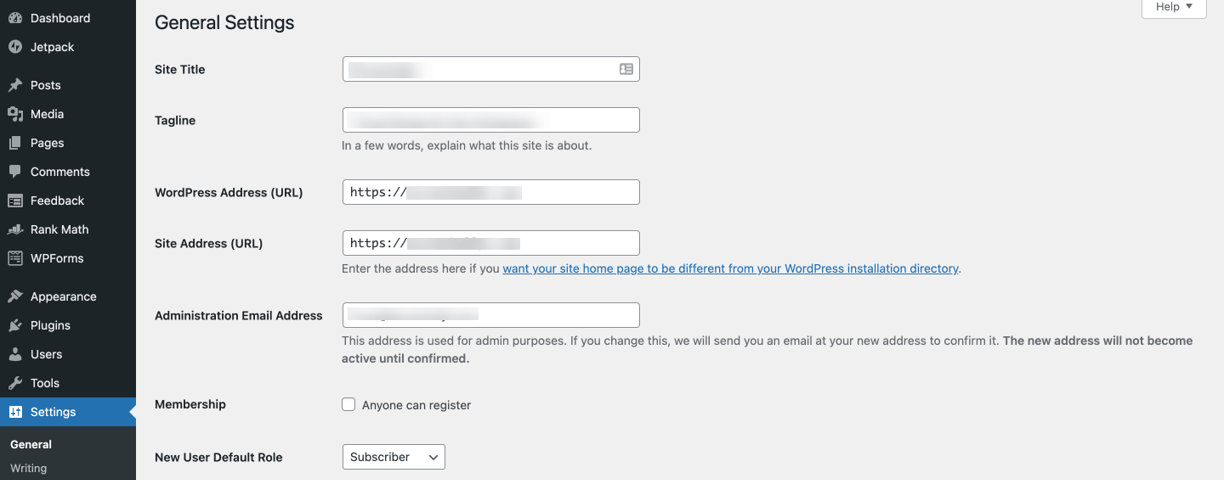
Site title and tagline: Make sure your site title and tagline are correct. If not you can edit them here. Your tagline should be a short phrase that describes your site or mission well. These can be modified whenever needed!
Site address: Make sure it is started with HTTPS:// instead of HTTP://. (If you need help with this, simply contact Bluehost support to make sure your SSL certificate is valid.)
Admin email: You can change the administrator email by entering a new one. If you’ve changed it you have to confirm it. Make sure that your email is active.
Membership: Do nothing if you are not going to register new members for your blog. Just leave it unchecked.
Timezone, date: You can change the time zone as you want. But remember, this will be very important if you are going to schedule blog posts.
Next, go to Settings > Permalinks and make sure “Post name” is selected.
This structure is easy for readers to understand and is suitable for your blog.
Remember to click “Save” if you have made any changes there!
Install important plugins. First, I recommend installing the Yoast SEO plugin. It helps you write blog posts that are search engine optimized, so you can attract more readers from search engines like Google and Bing.
What are WordPress Plugins?
WordPress plugins are software that helps you add more features to your WordPress site. You can install thousands of plugins to add widgets, create galleries, optimize performance, manage bookings, sell products, and more.
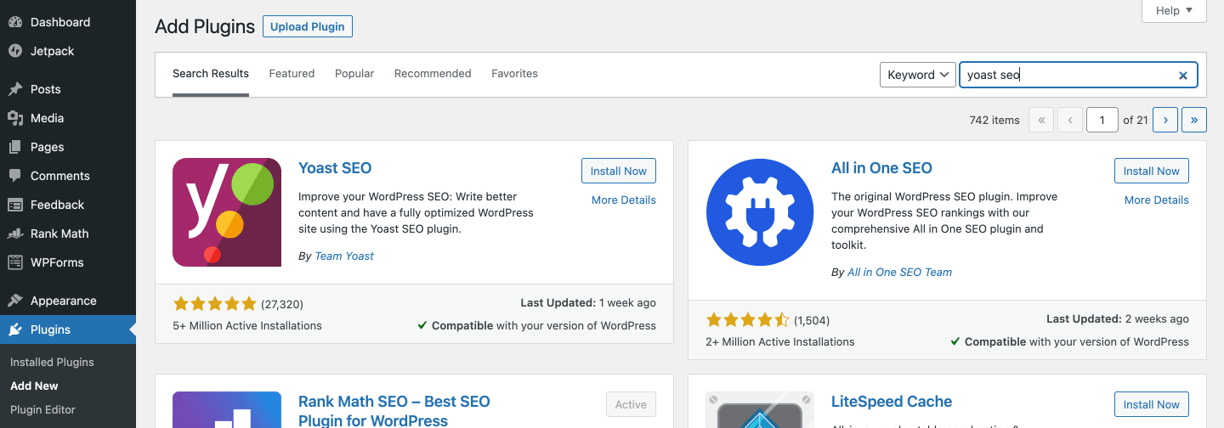
To install a WordPress plugin:
Go to Plugins > Add New.
Search for “Yoast SEO” on the search bar.
Click “Install Now” and “Activate” it.
I recommend installing the “WordFence” plugin to secure your blog from attackers and the “Contact Form 7” plugin to add a contact form to your blog.
Most WordPress plugins come with a setup guide, so there’s no need to worry.
Step 6: Customize and Launch it
Let’s customize your blog design. You can change your theme to any theme you like.
To do this, go to Appearance > Themes > Add New.
From there, you can search for and select your preferred theme.
Alternatively, if you have already purchased a premium theme from a third-party developer, you can upload it there.
What are WordPress Themes?
A WordPress theme controls how your blog looks. It includes the layout, colors, fonts, icons, widget areas, header images, background images, and other visual design elements of a blog or website.
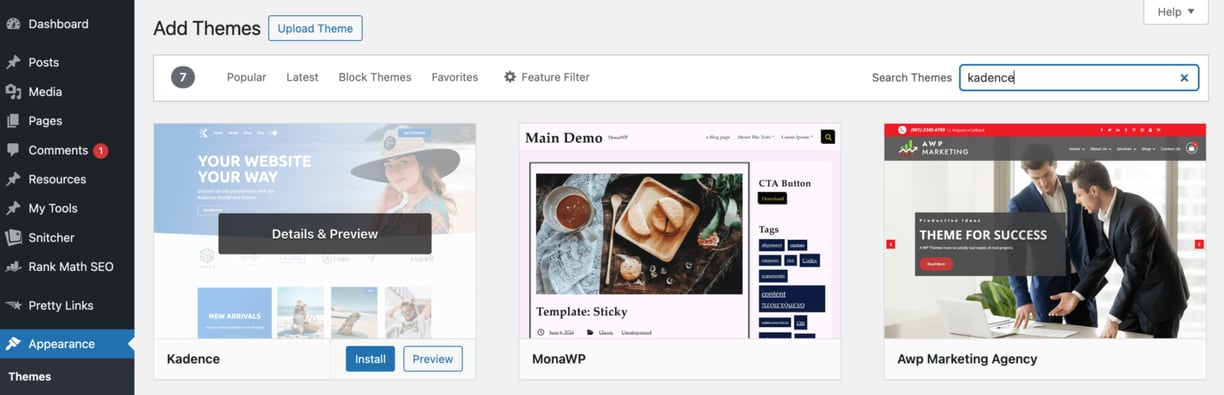
I really like the Kadence theme.
It’s a powerful theme that works excellently on all devices including PCs, laptops, mobiles, and tablets. It comes with both free and premium versions, with the free version providing a robust set of features for most users.
If you’re looking for advanced customization options, you can upgrade to Kadence Pro on their website.
The best part is they also have a Lifetime Full Bundle, which is a great thing to look out for if you’re planning to run more blogs in the future.
For those who prefer alternatives, the Astra theme is another excellent option with similar features.
Once you’ve selected and applied your chosen theme, navigate to Appearance > Themes > Customize to fine-tune your blog’s looks.
The customizer lets you make real-time adjustments to the layout and design of your site.
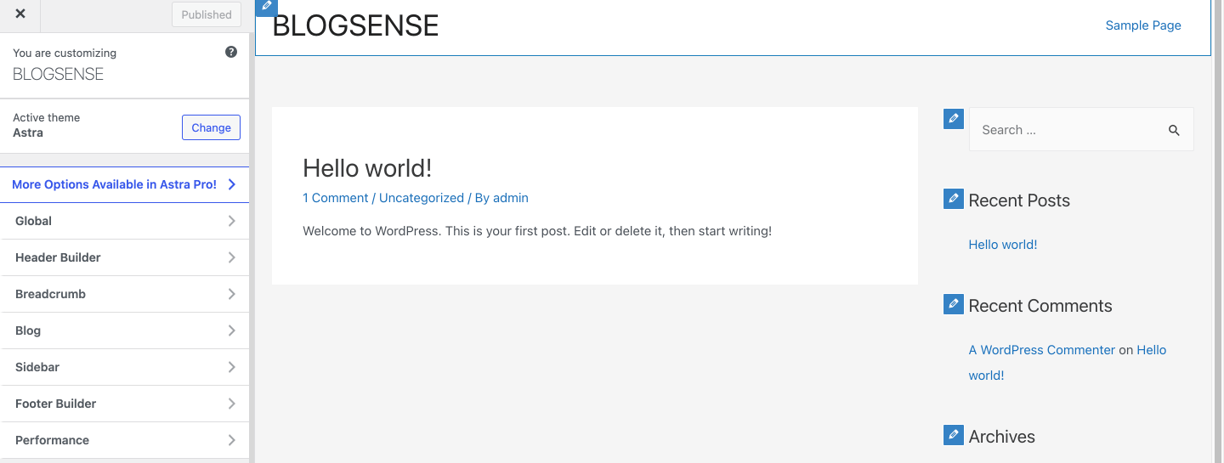
You can customize your site’s header by adding a logo or menu items, modifying the blog layout, adding widgets to the sidebar, and changing the footer area without needing to write any code.
I know that it may feel unfamiliar and overwhelming at first. I’ve been in the same situation as you are now.
Take your time to explore and you’ll find that it’s easy to learn everything.
Now you can start writing your first blog post. If you’re not sure what to write, just start writing something related to your blog topic.
If you’re feeling a bit lost, don’t worry!
Take a moment to read this guide on how to start your first blog post. It’s filled with all the essential details you need as a beginner blogger.
If you’re looking to create a new post, simply head over to the “Posts” section and click on “Add New.”
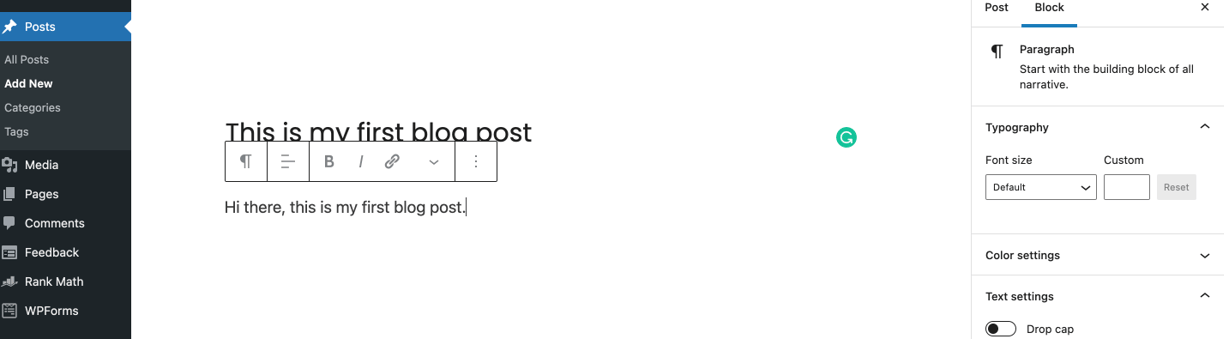
You can edit your blog posts whenever you want, so there’s no need to worry about making them perfect right away.
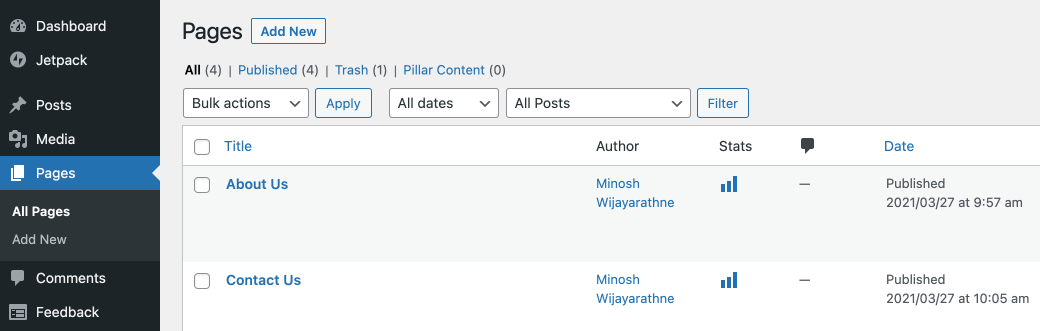
Also, make sure to include important pages for your blog.
To create a new page, go to Pages > Add New.
It’s a good idea to have an About Page, Contact Page, Disclaimer Page, Privacy Policy Page, and Terms of Service Page for transparency.
Yes, it can be challenging to create those pages on your own. You can use a website like CookieYes, which generates Privacy Policy pages for you to copy and paste onto your blog.
Well, it seems like you’re all set now!
Let’s get ready to launch your new blog.
However, before we proceed, there’s a small task that needs to be taken care of – removing Bluehost’s “coming soon” page.
Here’s what you need to do:
Log into your blog’s WordPress Dashboard (yourblog.com/wp-admin).
Navigate to Settings > General.
Scroll down until you find the “Bluehost Coming Soon Page” option and turn it off.
Don’t forget to click “Save.”
Now, open a new browser window and enter your domain name to see your brand-new blog in all its glory.
That’s it! You’re all done.
Your blog is now ready to be shared with the world.
I’m so happy for you! You did it! Now you have the most popular type of blog — a self-hosted WordPress blog.
What’s Next on Blogging?
The next important step is to focus on writing helpful content and attracting a large audience to your blog.
For beginner bloggers, I suggest writing in a way that feels natural to you and learning as you go.
Try different approaches and see what works and what doesn’t.
Look for other blogs and content in your niche to gain a better understanding of your target audience.
Additionally, start sharing your content on Pinterest, as it is a great platform for driving free traffic to your blog.
If you want to learn more about getting started with Pinterest, you can read my article “Pinterest for Bloggers.”
Most new bloggers often focus on making money right away, but it’s important to prioritize the content of your blog from the start.
When your blog has a valuable audience and does well, you can start making money with platforms like Journey by Mediavine.
The best thing is getting started with them is so easy and you can monetize your blog while growing it, meaning even if you’re a beginner blogger, there is a way to monetize it.
However, this doesn’t mean you can monetize your blog and earn thousands of dollars right after launch; consistently creating blog content that helps others is the key to long-term success.
Here are a few other simple tools we used that you can also use to improve your blog and attract more readers:
About
We assist regular people in launching and expanding their internet businesses from the ground up. Beginner-friendly, extremely simplified resources to help "YOU" at every stage. Today, take the first step.
Copyright © 2019-2025 TalkEra